Zoom Integration - Set Up and Appointment Creation
Estimated Reading Time: 3 MinutesAdding Wylie to your Zoom Account:
- If you do not already have a Zoom account, create one by going to https://zoom.us/.
- Once logged into your primary account, in the navigation menu on the left-hand side scroll down and select ''User Management', then 'Users'. Select the blue '+ Add Users' button on the page to add the emails of each employee who will be handling Zoom appointments in Wylie. Employees will receive an email to confirm the creation of their user account.
- Then, sign into Wylie and select the ‘settings’ menu.
- Select ‘integrations/plugins’.
- If the integration is already active on your account, you will see the option 'Zoom', select it. If not, select 'manage integrations', then select 'activate', then 'continue to Zoom settings'.
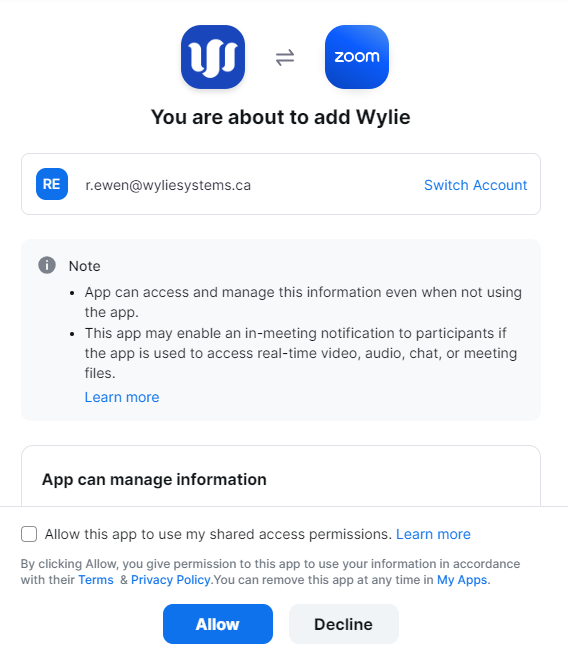
- Select ‘connect Zoom account’ and sign into your primary Zoom account when prompted. Ensure you check the box at the bottom of the page that asks if you 'Allow this app to use my shared access permissions.' and select 'allow' when signing into your Zoom account.
- Now, in Wylie go to the 'settings' menu, then 'employees/staff'. Select the edit pencil beside an employee who will be handling Zoom meetings and choose their email from the 'Zoom account' dropdown. Repeat this step for each employee handling Zoom appointments in Wylie.
Usage - Creating a Zoom meeting in Wylie:
Creating a Zoom meeting at the time of scheduling an appointment in Wylie:
- In Wylie, select the 'calendar icon' then, 'appointment scheduler'.
- Choose the day and time you would like to schedule the appointment.
- Under 'option' at the bottom of the appointment form select the check box beside 'Zoom meeting'.
-
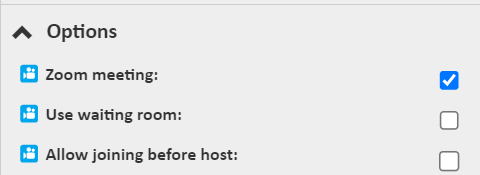
- As you can see, there are two other options that can be selected. select 'Use waiting room' if you do not want the client to be able to join the meeting before the host and select 'Allow joining before host' if you would like the client to be able to join the meeting before the host.
- Once the appointment is saved, the client will receive a link to their Zoom meeting in their email notification and reminder.
-
The blue video camera icon lets you know that the appointment is a virtual Zoom appointment.

- To join the Zoom meeting, at the time of the appointment click on the appointment in the Wylie scheduler, then select the 'Zoom Meeting' link.
Setting a service in Wylie as a Zoom meeting by default: This will create and send a Zoom meeting link to your client from Wylie automatically when creating an appointment for that specific service (including appointments booked online).
- In Wylie select the 'inventory' menu, then 'products & services'.
- Add or edit a service and select 'yes' from the dropdown beside ‘create Zoom meeting by default’.
- When you create an appointment for a client for this specific service, the Zoom link will be created and automatically included in their email notification and reminder email for the appointment.
Joining a Zoom Meeting:
- At the time of the appointment go to the appointment scheduler in Wylie.
- Click the appointment with the associated Zoom link.
- Select the 'Zoom Meeting' link to join the meeting.
* if you would like to easily see appointments and join Zoom meetings from your phone learn how to download the Wylie App.
Disconnecting Wylie from Zoom:
- Login to your Zoom Account and navigate to the Zoom App Marketplace.
- Click Manage >> Added Apps or search for the “Wylie” app.
- Click the “Wylie” app.
- Click Remove.