How to Add or Edit a Service
Estimated Reading Time: 3 MinutesTo add a new service, go to the 'inventory' menu in the top blue bar. Then, select 'products & services' and once you are in the products and services table, select the 'add product or service' button at the top of the table.
To edit a product or service, select the edit pencil icon to the far right of the product or service name in the table.
How to add a service:
- Select 'Add Product or Service' button at the top of the table.
-
Select 'service' from the 'product or service' drop-down at the very top of the form.
-
Enter the 'name' of the service.
-
Enter the service 'abbreviation' - this is what appears on the appointment to indicate the service type and can be up to 12 characters long.
-
Enter the 'Appointment length (hh:mm)', making sure to follow the appropriate format (hh:mm). For example, if the appointment is an hour and a half long, you would enter 01:30.
-
Select yes or no from the drop-down to 'Create Zoom meeting by default'. To use this setting, you must have your Zoom account connected to Wylie, and the employee available to book this appointment must have a Zoom account connected to their employee account. Click this link to learn how to set up the Zoom integration.
-
Indicate if this service can be booked online by the client (either on your website or the portal/app) by selecting yes or no to 'Show in eBooking System?' drop-down
-
Online booking specific setting: If the service has different availability from typical business hours and staff hours, select 'edit service hours' to enter the specific availability.
-
Online booking specific setting: From the drop-down 'Booking: Require payment in advance', choose whether the client will need to add card on file, a deposit, or full payment when booking online.
-
Online booking specific setting: The 'eBooking: Viewable by...' drop down indicates if the service should be viewable by current 'customers only', 'non customers/leads only', or both 'customers or leads'. Typically, you should choose 'customers or leads'.
-
Online booking specific setting: 'eBooking: Show a time slot every... (minutes)' indicates whether the service will be bookable on the hour, half hour, etc..
-
Online booking specific setting: eBooking: Allow user to choose a specific employee? This is where you will indicate if this service is bookable with certain employees and if the client will have the option to choose the employee. If this is the case, choose ' yes, with no preference option'.
-
Online booking specific setting: 'eBooking: How to handle unassigned appointment?' choose if the appointment booked should be left unassigned This means, if no employee chosen at the time of booking admin will need to assign it to an emplyoee later. 'assign to available employee with fewest appointments' and 'assign to available emplyee randomly' will assign the appointment atomatically.
-
Online booking specific setting: Select 'add employee' and choose from the drop-down to indicate which employee can perform this service.

-
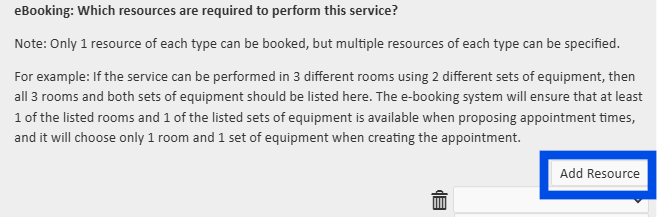
Online booking specific setting: Choose 'add resource and choose the appropriate resource from the drop-down. This will ensure a service is not double-booked when it requires a limited resource. Click here to learn how to add additional resources in Wylie.
-
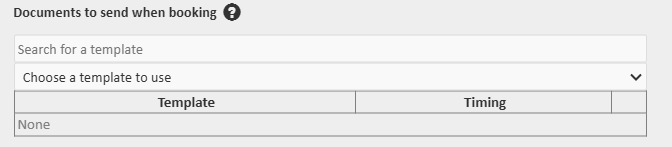
Choose an existing document template to be sent out automatically when this service is booked and adjust the desired timing. (E.g., Consultation form)
-
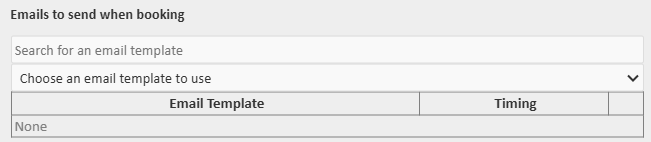
Choose an email template to be sent automatically when the service is booked and adjust the desired timing. (E.g. pre and post care instructions or welcome email)
-
Select applicable table codes. Click here to learn how to add tax codes.
-
Choose a category. Click here to learn how to add a category.
-
Select the 'generate your own UPC code' button.

-
Enter the price of the service (this will appear when the client is booking online).
-
Select 'save' in the bottom right of the form.